July 5Jul 5 Most of you will already know this buildlogHere we go 👍🏻This is not my first model; the previous model was the Golden Hind/Pelican in 1/45 scale in Scratch.My first wooden model was the Vasa Billing Boats.The Mary Rose was built in 1515 and sank in 1545. The remains have been salvaged and are now on display in a museum.This will be an attempt to rebuild the ship on the cover of "Your Noblest Ship".History (Wiki)https://nl.wikipedia.org/wiki/Mary_Rose_(schip,_1512)Museumhttps://maryrose.org/your-visit/Used books.The book Tudor Warship contains a frame plan that has been enlarged to a scale of 1/50.ready to be sawn outThe frames have been sawn.There is a first time for everything (never done before), the hull will be built upside down.Looks decentIn the following posts, it will become apparent that the shape of the frames is not entirely correct. regards, Patrick,si vis pacem para bellumIn proces : Mary rose scratch 1/50 Dutch kanonneerboot (Mantua)Finished: Soleil Royal Heller 1/100 Bounty (extra detail) Revell 1/110 Pelican/Golden Hind 1/45 scratchJacht d'Oro (extra detail) Corel 1/50Vasa Billing boats 1/75
July 5Jul 5 Author The frames, continuedAs can be seen in the photo, the shape of the frames from the book MR Tudor Warship is pretty good.But if you compare this with the frame example from MR your Noblest Shippe, there is a considerable difference.The advantage of the Mary Rose Noblest shippe is that fairly clear plans are included at a scale of 1/100. The one in the photo is enlarged by 200%.Determining the position of the frames is also going quite well.The frames are called sections here; the original wreck has been subdivided into sections to make it easier to place found objects.As you can see, there is a clear difference.So, extra frames are made.The length-to-width ratio also matches the noblest shippe dimensions better.And adjusting the "old" framesThe difference between section 10 and frame 11 is clearly visible.The new sections ( 1 5 6 8 10 ) are in the correct place and the frames (1 - 12) are being adjusted.Regards, Patrick, regards, Patrick,si vis pacem para bellumIn proces : Mary rose scratch 1/50 Dutch kanonneerboot (Mantua)Finished: Soleil Royal Heller 1/100 Bounty (extra detail) Revell 1/110 Pelican/Golden Hind 1/45 scratchJacht d'Oro (extra detail) Corel 1/50Vasa Billing boats 1/75
July 5Jul 5 Author The used wood for planking and etc :Cherrythis was originally going to become firewood, but I thought it was a waste...) has been drying for 8 years now.For the rough preparatory work, the "heavier" tools are used.Regards, Patrick, regards, Patrick,si vis pacem para bellumIn proces : Mary rose scratch 1/50 Dutch kanonneerboot (Mantua)Finished: Soleil Royal Heller 1/100 Bounty (extra detail) Revell 1/110 Pelican/Golden Hind 1/45 scratchJacht d'Oro (extra detail) Corel 1/50Vasa Billing boats 1/75
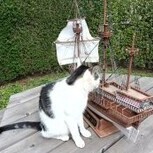
July 5Jul 5 Author Modify the frames and make an opening in the middle.Leveling the construction boardAligning frames with the laserMake sure the screws remain accessible...The aft section is finished. There were some problems with the bow, which is why the keel was sawn through.Supervisor Felix has control over the shipyard Regards, Patrick, regards, Patrick,si vis pacem para bellumIn proces : Mary rose scratch 1/50 Dutch kanonneerboot (Mantua)Finished: Soleil Royal Heller 1/100 Bounty (extra detail) Revell 1/110 Pelican/Golden Hind 1/45 scratchJacht d'Oro (extra detail) Corel 1/50Vasa Billing boats 1/75
July 5Jul 5 Author A new bowA noticeable difference from my first bow...And now it becomes clear why the waterlines were incorrect.So further adjust and reposition the forward frames.The frames are screwed to the base plate and the waterlines are now reasonably correct.The next task is gluing the frames to the keel pieces.Regards, Patrick, regards, Patrick,si vis pacem para bellumIn proces : Mary rose scratch 1/50 Dutch kanonneerboot (Mantua)Finished: Soleil Royal Heller 1/100 Bounty (extra detail) Revell 1/110 Pelican/Golden Hind 1/45 scratchJacht d'Oro (extra detail) Corel 1/50Vasa Billing boats 1/75
July 5Jul 5 Author Supports are glued between the framesready for a first sandingSanding and other dust-producing activities take place outdoors.The next step is to fill in the lower part of the hull with wooden "filler blocks".The first one is in placeRegards, Patrick, regards, Patrick,si vis pacem para bellumIn proces : Mary rose scratch 1/50 Dutch kanonneerboot (Mantua)Finished: Soleil Royal Heller 1/100 Bounty (extra detail) Revell 1/110 Pelican/Golden Hind 1/45 scratchJacht d'Oro (extra detail) Corel 1/50Vasa Billing boats 1/75
July 5Jul 5 Author The lower part of the hull has been filled with blocks. This is some extra work, but it provides a solid base for the planking later.(The most ugly hull on DDM??)For rough sanding, "met grof geschut in Dutch (heavy artillery)"best to do this outside in the garden...And after a few minutes, mutch better.The rest has been sanded by hand, giving this result.What already stands out is the pointed shape of the bow. Never expected that on a big carrack like this.Regards, Patrick, regards, Patrick,si vis pacem para bellumIn proces : Mary rose scratch 1/50 Dutch kanonneerboot (Mantua)Finished: Soleil Royal Heller 1/100 Bounty (extra detail) Revell 1/110 Pelican/Golden Hind 1/45 scratchJacht d'Oro (extra detail) Corel 1/50Vasa Billing boats 1/75
July 5Jul 5 Author The next step will be the planking.First, I need to determine what goes where and how thick planks and such need to be cut.At the rear, in the stern, there are 2 cannons (stern chasers).Wrong or right? Tactically and historically, it could be correct.preliminary sketch.Positioning of the lower "wale" (the W1 on the previous sketch) using the laserWith the laser as a guide and a ruler, this position can easily be measured.The position has been determinedDuring a period of dry weather, wood was sawn.Cherry firewood became "model boat wood".A stock of small board of various thicknessesAnd pieces for the planking and the keel regards, Patrick,si vis pacem para bellumIn proces : Mary rose scratch 1/50 Dutch kanonneerboot (Mantua)Finished: Soleil Royal Heller 1/100 Bounty (extra detail) Revell 1/110 Pelican/Golden Hind 1/45 scratchJacht d'Oro (extra detail) Corel 1/50Vasa Billing boats 1/75
July 5Jul 5 Author The keelThe keel consisted of 3 parts, the front and rear ones of elm and the middle one of oak.So the middle section of my keel consists of cherry, like the rest of the planking. The other parts are made of ramin (the last remnants from my previous project).Gluing the pieces togetherA groove was provided on the front and back. regards, Patrick,si vis pacem para bellumIn proces : Mary rose scratch 1/50 Dutch kanonneerboot (Mantua)Finished: Soleil Royal Heller 1/100 Bounty (extra detail) Revell 1/110 Pelican/Golden Hind 1/45 scratchJacht d'Oro (extra detail) Corel 1/50Vasa Billing boats 1/75
July 5Jul 5 Author Gluing the keel and the bow piece.PreparationThe first partGluing the keelThe entire bow section is glued.This piece is much too long. Cutting it to size and shortening it later is easier than having to make it longer.Nothing of the connection between the keel and the bow piece has stood the test of time. So, it's guesswork.The connections between the keel pieces regards, Patrick,si vis pacem para bellumIn proces : Mary rose scratch 1/50 Dutch kanonneerboot (Mantua)Finished: Soleil Royal Heller 1/100 Bounty (extra detail) Revell 1/110 Pelican/Golden Hind 1/45 scratchJacht d'Oro (extra detail) Corel 1/50Vasa Billing boats 1/75
July 5Jul 5 Author The sternFirst, some plastic surgery in the plywood.Gluing the first and second partsGlue the last 2 partsThe keel has been shaped at the back, and it even looks like it in the drawing regards, Patrick,si vis pacem para bellumIn proces : Mary rose scratch 1/50 Dutch kanonneerboot (Mantua)Finished: Soleil Royal Heller 1/100 Bounty (extra detail) Revell 1/110 Pelican/Golden Hind 1/45 scratchJacht d'Oro (extra detail) Corel 1/50Vasa Billing boats 1/75
July 5Jul 5 Author The plankingFirst of all, we are making the walesThe form they gave it back then is something nice ... Therefore, a kind of scraper was first made in the correct shape.And then we do thisAnd we get this. Later I discovered that this shape was so that water standing on the wale could not seep inside.The "planking example"Green are the front and back pieces that fit into the keel.The red one is a very wide plank at the bottom; I'm making it narrower so I don't run into problems later.I still need to take a look at blue (a veeeery wide plank...)The cherry wood is first moistened, if necessary, and bends very easily.Planking has started regards, Patrick,si vis pacem para bellumIn proces : Mary rose scratch 1/50 Dutch kanonneerboot (Mantua)Finished: Soleil Royal Heller 1/100 Bounty (extra detail) Revell 1/110 Pelican/Golden Hind 1/45 scratchJacht d'Oro (extra detail) Corel 1/50Vasa Billing boats 1/75
July 5Jul 5 Author First, i sawed a batch of planks of various widths.The sternPlanked at a 45° angleFurther planning.In those days, different widths of planks were used. As can be seen in the photos, it is sometimes a bit of a puzzle, hence all the lines, numbers, and notes.And sometimes things don't go as planned... And an adjustment is needed.First sign off on what is in excess."and a bang with the hammer" Back on the right track regards, Patrick,si vis pacem para bellumIn proces : Mary rose scratch 1/50 Dutch kanonneerboot (Mantua)Finished: Soleil Royal Heller 1/100 Bounty (extra detail) Revell 1/110 Pelican/Golden Hind 1/45 scratchJacht d'Oro (extra detail) Corel 1/50Vasa Billing boats 1/75
July 5Jul 5 Author For some reason, back then they deemed it necessary to start the bow with an extra wide plank.We use an extra wide plank as a starting point for this.It is first brought into approximately the correct shape at the bottom.soaked in water and bentAnd made and glued in the correct shapeThe remaining opening goes from narrow at the bow, through wider in the middle, to narrower again at the stern.So, this looks okay for now. regards, Patrick,si vis pacem para bellumIn proces : Mary rose scratch 1/50 Dutch kanonneerboot (Mantua)Finished: Soleil Royal Heller 1/100 Bounty (extra detail) Revell 1/110 Pelican/Golden Hind 1/45 scratchJacht d'Oro (extra detail) Corel 1/50Vasa Billing boats 1/75
July 5Jul 5 Author One row of the planking has a special shape at the transom / stern.Work in progressThe last rowOne side is finished and has had a first sanding with 200 grit sandpaper.And for the first time, not upside down regards, Patrick,si vis pacem para bellumIn proces : Mary rose scratch 1/50 Dutch kanonneerboot (Mantua)Finished: Soleil Royal Heller 1/100 Bounty (extra detail) Revell 1/110 Pelican/Golden Hind 1/45 scratchJacht d'Oro (extra detail) Corel 1/50Vasa Billing boats 1/75
July 5Jul 5 Author The planking on the other side is about halfway.The widths of the planks are simply taken from the other side, so much less thinking and calculating this time.Planking done, sanding timeResult of the first sanding.I am quite happy with this special plank at the stern.First, a "quality control" check follows. After that, further sanding will take place and the keel will be tapered. regards, Patrick,si vis pacem para bellumIn proces : Mary rose scratch 1/50 Dutch kanonneerboot (Mantua)Finished: Soleil Royal Heller 1/100 Bounty (extra detail) Revell 1/110 Pelican/Golden Hind 1/45 scratchJacht d'Oro (extra detail) Corel 1/50Vasa Billing boats 1/75
July 5Jul 5 Author After a day of sanding in the sun, the lower part of the hull has been sanded.The keel and the stem are tapered.As you can see, the model has also been detached from the base plate.The tapered keel; the cross-section drawings were very helpful for this.A bit straighter than the original, though...Tapering the bow was a bit of a free interpretation; little of the original remained.And, Mary Rose landed on her feet (keel)The base plate must now be modified before construction can continue.A new base plate.Large and bulky, but sturdy, and the model is easily accessible.It is also still possible to align them neatly and at right angles.Here and there, the "wale" was slightly the wrong shape.The wood glue was loosened with isopropyl alcohol and the whole thing was glued back.Check if we are still at the correct height based on the dimensions on the cross-sections.Only a 1 mm deviation here and there, that's fine with meThe first plank is going inA lot of clampingThe intention is to install at least 2 planking strakes. These will serve as base support at the bottom for the wooden frames that will replace the plywood. regards, Patrick,si vis pacem para bellumIn proces : Mary rose scratch 1/50 Dutch kanonneerboot (Mantua)Finished: Soleil Royal Heller 1/100 Bounty (extra detail) Revell 1/110 Pelican/Golden Hind 1/45 scratchJacht d'Oro (extra detail) Corel 1/50Vasa Billing boats 1/75
July 5Jul 5 Author Further planking.Planking with just the plywood frames isn't really easy. That's why I'm going to add the gunport frames first.First measure on the drawing and then transfer to the model. From scale 1/100 to 1/50, so multiply everything by 2.And the dimensions on the drawings match the information in the book quite well.Constructing and installing framesSome sawing and breaking work now and then...For some reason, the gunports were given an M number in the book. M3, M4, M5 (BMW fans?The planking is going much better now (there is more support and clamping points). regards, Patrick,si vis pacem para bellumIn proces : Mary rose scratch 1/50 Dutch kanonneerboot (Mantua)Finished: Soleil Royal Heller 1/100 Bounty (extra detail) Revell 1/110 Pelican/Golden Hind 1/45 scratchJacht d'Oro (extra detail) Corel 1/50Vasa Billing boats 1/75
July 5Jul 5 Author The bow still requires some thought.I think I'm going to fill in the section between frame one and the bow at this height; you won't see it internally anymore, and it provides good support.The form remains sharp.And at the front there is also a gunport, in accordance with findings from the wreck and paintings from that time.Appropriately named Mx.We continue with the port side. There is nothing left of it, so this will be a good exercise before starting on the starboard side.The port gunports have largely survived, and it turns out that they are always the same width as the starboard side (why then do they make them the same width on their 1/100th scale drawings....)The front cannon must be able to shoot forward reasonably well (see drawing of the Great Harry).While chopping wood, I accidentally made the ideal support for the bow...The planking and the making of the gunports are underway.There is still a lot of touching up and sanding to do, but it is heading in the right direction. regards, Patrick,si vis pacem para bellumIn proces : Mary rose scratch 1/50 Dutch kanonneerboot (Mantua)Finished: Soleil Royal Heller 1/100 Bounty (extra detail) Revell 1/110 Pelican/Golden Hind 1/45 scratchJacht d'Oro (extra detail) Corel 1/50Vasa Billing boats 1/75
July 5Jul 5 Author The planking between the second and third wale is finished on the port side. And the gunports have been worked out.Time to give this a first sanding.Before sandingAfter sanding.The irregular placement and varying dimensions of the canon ports are clearly visible.Close upQuality control regards, Patrick,si vis pacem para bellumIn proces : Mary rose scratch 1/50 Dutch kanonneerboot (Mantua)Finished: Soleil Royal Heller 1/100 Bounty (extra detail) Revell 1/110 Pelican/Golden Hind 1/45 scratchJacht d'Oro (extra detail) Corel 1/50Vasa Billing boats 1/75



Join the conversation
You can post now and register later. If you have an account, sign in now to post with your account.